Drilling Control Valves on Member's Mark BBQ Grill for LP->NG

Last Updated May 20th, 2004 The control valves regulate the flow of gas by turning it OFF and ON and provide variable output. How does it do that? Remember that the orifice diameter is fixed, so at the OFF setting, no gas flows. At the HIGH setting, the control valve lets "lots" through, since the orifice will regulate. And at the LOW setting, the control valve has a smaller opening than the orifice, so it becomes the limiting factor. Any position in between gets some volume of gas in between. The pictures below should make this quite clear how this is done. Note that the control valves are basically the same for all five burners.

So once you have drilled out and tuned/tweeked your orifices so you have the HIGH setting, you then drill out the control valves for the LOW setting. Note that if you do NOT do this, then you almost certainly will not be providing enough gas at the LOW setting, and you run the risk of a flame-out, and then unburned gas collects and a spark/flame might subsequently ruin your day!

So what I did was drill things out, and then in the evening (because the blue flame is almost impossible to see during the day), fire up the grill at the LOW setting and look for a "decent" flame. Better yet, wait for a moderate wind, and observe how well the flame holds. Remember that ANY flame can be blown out with sufficiently strong wind; be careful grilling on LOW on a windy day and be sniffing for gas.

You should have some idea of "about" the right size to drill out. Be sure to read the notes about this in the LP-NG Conversion Web Page. Notice I said "about" above ... NG has different "heat/burn BTU's", different pressure, and probably other things I'm not even aware of. In my opinion, you want the grill to operate at the same BTU's as before and/or provide the same amount of heat/temperature as before. Again, read the notes in LP-NG Conversion Web Page that talks about this "tuning/tweeking" process.

To state the obvious, it is much easier to drill a hole larger - much more work to make it smaller ... so work your way up to the "right" size.

Back to main BBQ Grill page - © 2002-2004 www.komar.org


I removed the metal front cover to make futzing/pictures easier, but this is not neccessary if you have a steady hand as one can reach in there with your fingers and do everything shown here with the cover on.
bbq grill drilling out valves 2


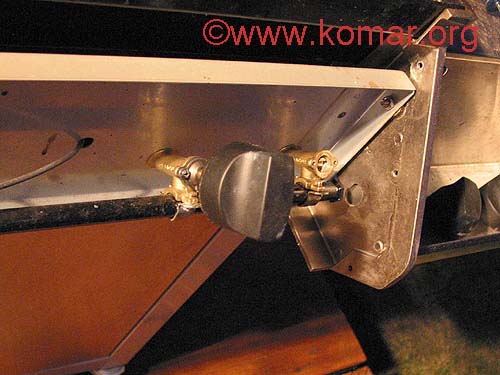
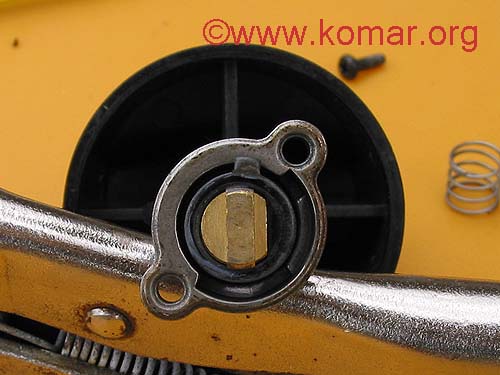
Remove the misc. stuff from the control valve and you will see two screws. Note "H" goes on the bottom for re-assembly.
bbq grill drilling out valves 3


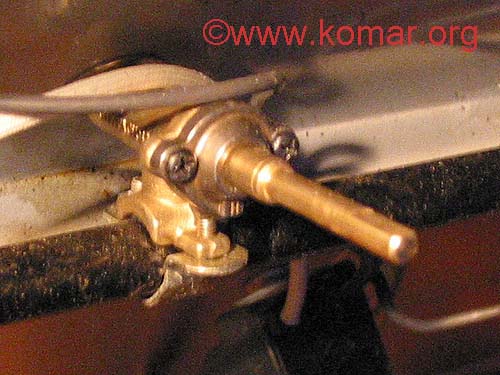
Remove those two screws and pull the assembly off. CAREFUL ... there is a spring and a "D-ring" in there. BTW, the "D-ring" was a pain to put back on correctly, so I just plastic cemented it in place. Note that you do NOT fiddle with the screws that attach the valve to the manifold.
bbq grill drilling out valves 4


Remove the cone shaped piece of metal - sorry 'bout the fuzzy picture
bbq grill drilling out valves 5


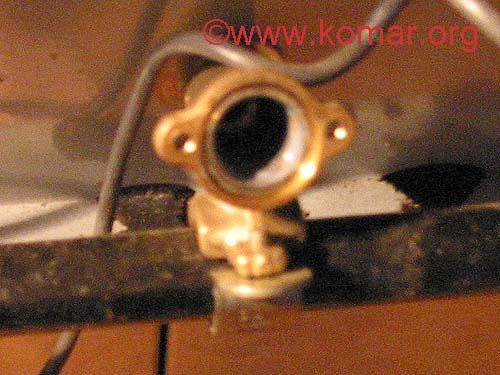
Take a look in here under good light and you'll see that gas flows from the manifold at the bottom through that cone shaped metal via its holes (see below) to the orifice at the back. Digicam macro was "hunting" a bit here also.
bbq grill drilling out valves 6


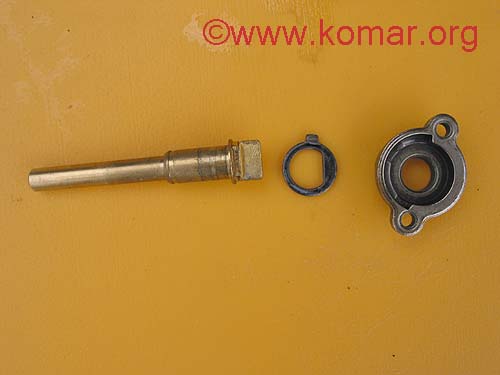
Here is all the pieces removed
bbq grill drilling out valves 7


Here is what it looks like from the "other" side. Note the D-ring that seats in the cover (it is intentionally out of the groove now so more visible) is what limits the travel from OFF/HIGH/LOW. BTW, the back burner control valve is (basically) the same - the only difference being that the grooves on that cover only allow 90 degrees of travel, so just OFF/ON. As discussed elsewhere, you can either remove the D-ring, or drill out the groove to 170 degrees or so, and with appropriate adjustments, you now have a variable back burner.
bbq grill drilling out valves 8


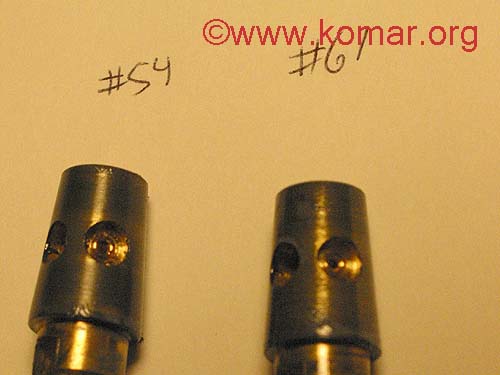
Here are those same three pieces seperated
bbq grill drilling out valves 9


The holes on the left side of these two pieces are "large" and are used on the HIGH setting. As you rotate the control valve, it ends up using small hole at the LOW setting (obviousely smaller than the orifice itself). If you play with the pieces a bit, it will become pretty obvious how this works. The small hole was a little smaller than a #60 (0.040") as shipped for LP - I ended up drilling to #54 (0.055") for NG - it's not much different!
bbq grill drilling out valves a


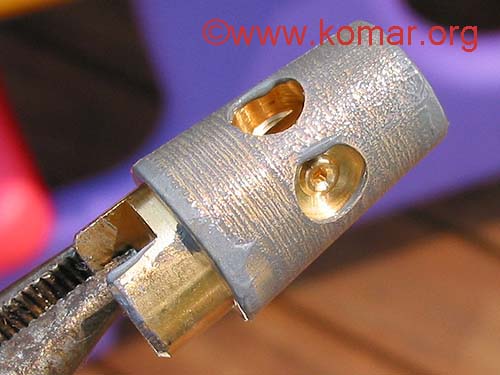
Here is a closeup kinda showing the large hole used by the HIGH setting. Gas flows through the holes to the open top to the orifice.
bbq grill drilling out valves b


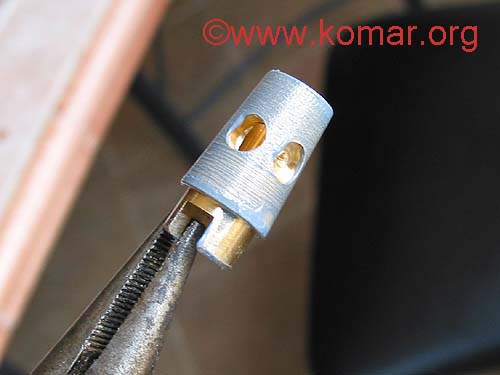
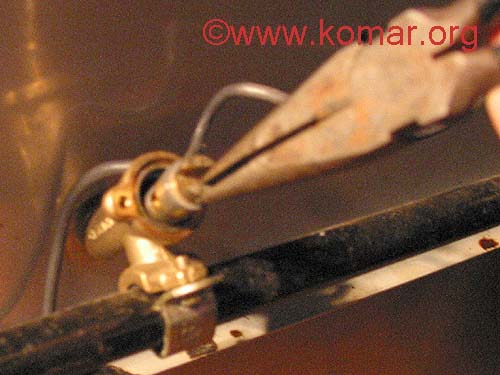
A REAL close-up. Note the grease ... this needs to rotate easily, so handle with needle nose pliers as shown as much as possible.
bbq grill drilling out valves c


Not very big ... but pretty darn important. As noted, drill it out and reverse above procedure. Pay close attention to being consistant with the cone-shaped metal piece, D-ring (as noted, I plastic cemented this in place to make things easier), and valve (per picture above, the "H" is on the bottom) so that it's truly OFF/HIGH/LOW when assembled. Otherwise, you'll have to undo it and flip it 180 degrees; which I had to do a couple of times! ;-)
bbq grill drilling out valves 1