That's right, with a click of a mouse, anyone in the world can "control" my house! ;-)
X10 is typically used in more mundane applications ... like turning your lights ON at Dusk and OFF at Dawn - i.e. twice a day. So having to go ON/OFF thousands of times (Check out this 200x time-lapse of an XTBM Signal Meter - it's almost like a random walk ;-) a night is a severe test of X10 equipment and certainly way beyond their design criteria ... and I typically have a couple of SR227 X10 Super Sockets "die" on me every year. Instead of a "click" for ON (or OFF), they stay in the ON position and when commanded to go OFF, you hear a "machine-gun" click-click-click - here's an audio that describes what happens.
As seen in the pictures below, I have collected quite a few "bad" X10 Super Sockets and Modules. So when the first one died in 2012 (and I was down to my last backup), rather than buy more on eBay, I did some Internet research and came across these two great writeups here and here.
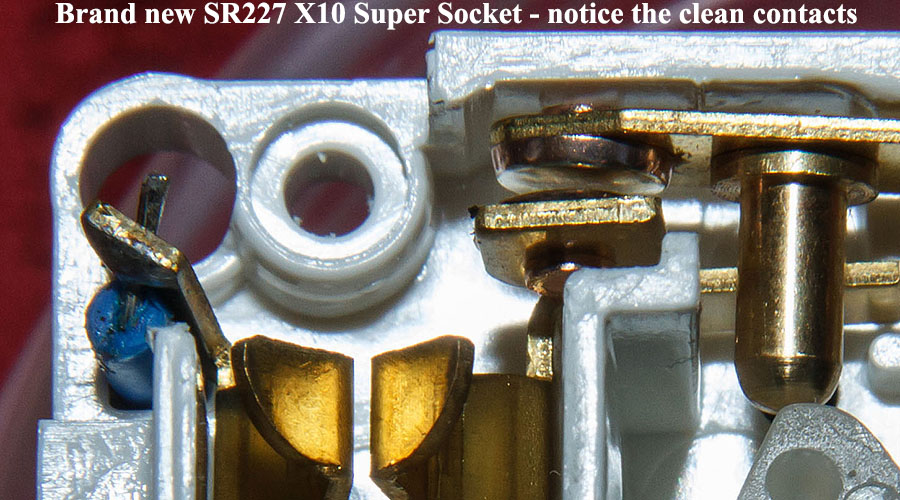
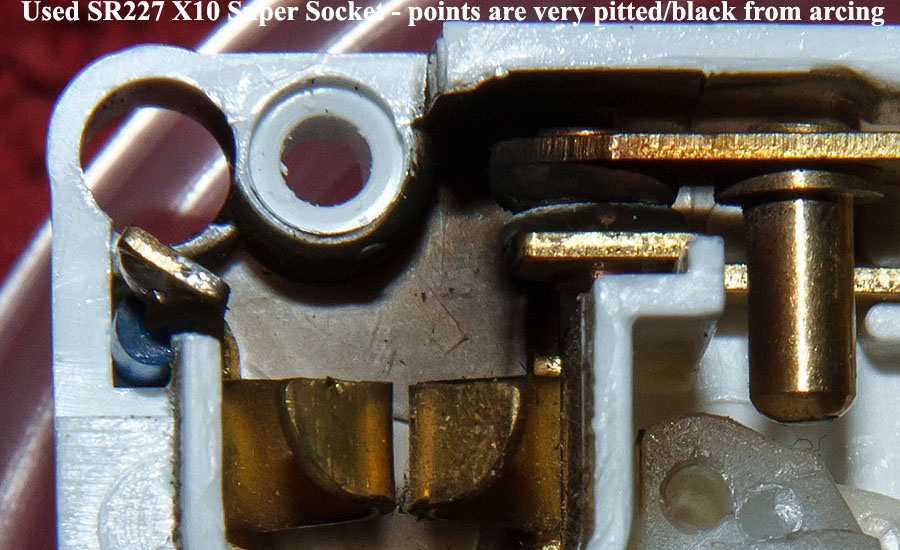
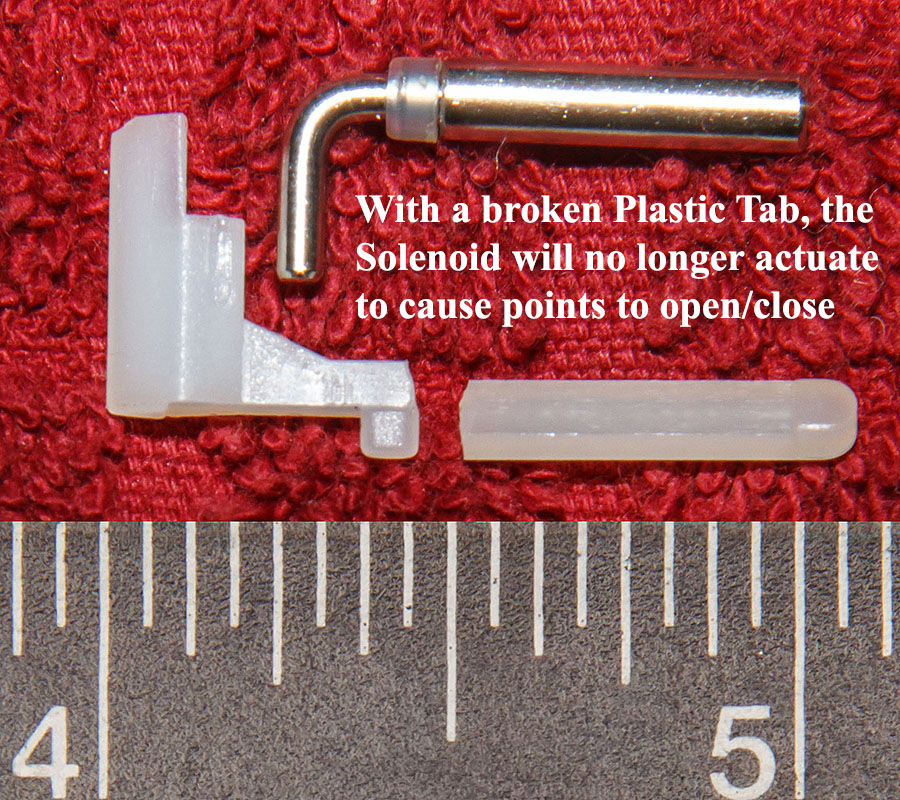
In a nutshell, the most common failure mechanism is breakage of a thin plastic tab that then prevents the solenoid mechanism from working. Another problem is the points get pitted from internal arcing. Both of these manifest themselves as a "click-click-click" as the Super Socket fires the Solenoid several times to try to get the unit to work.
Most of my SR227's had broken plastic tabs - and I didn't even try repairing that as even Epoxy probably wouldn't work. But it was intact on several others and the problem was pitted points, so it was a fairly straightforward to disassemble the Super Socket (two sets of two screws), clean up the points, and then put it back together ... and I was able to get three of them back into working condition. Some pictures below illustrate the process.
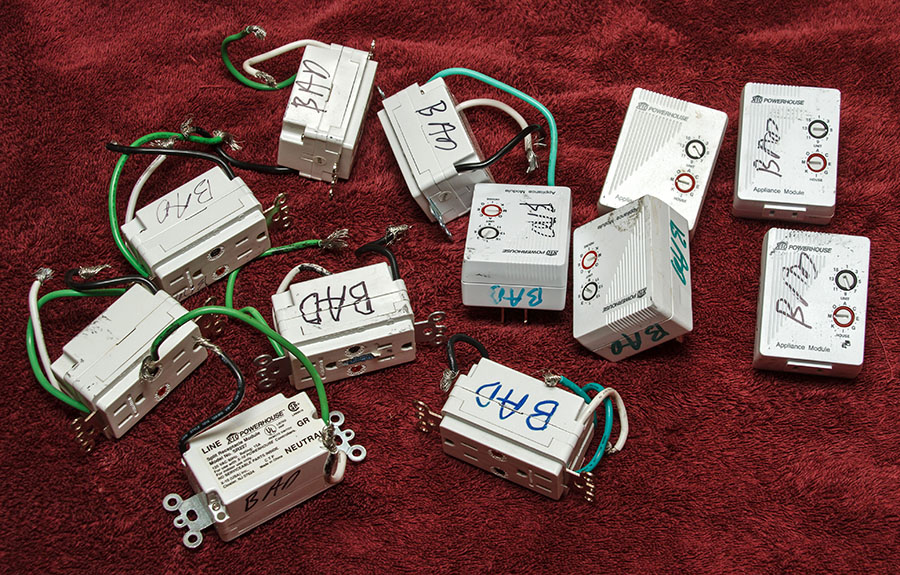
A bunch of "BAD" SR227 X10 Super Socket and Appliance Modules
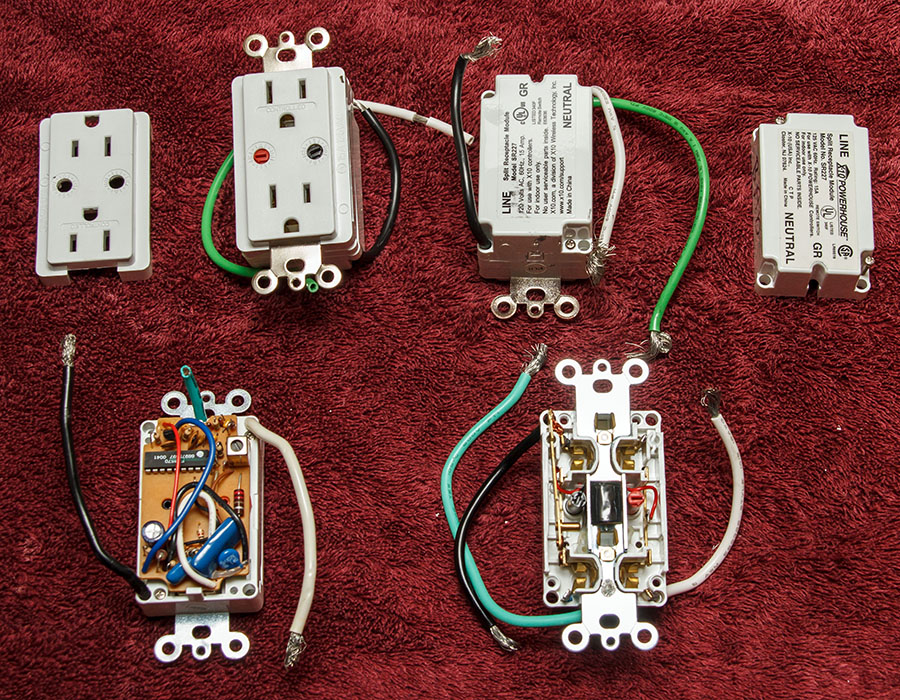
Front and back views of an X10 Super Socket diassembled
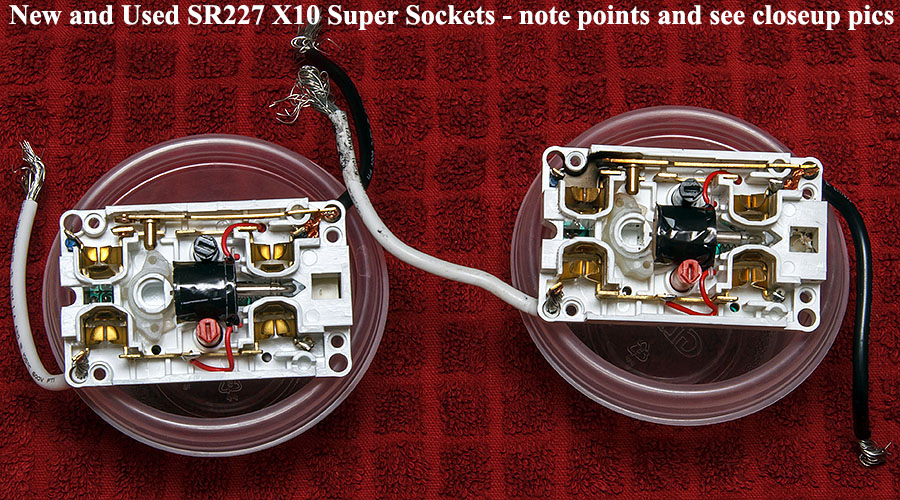
The "innards" of a new and used SR227
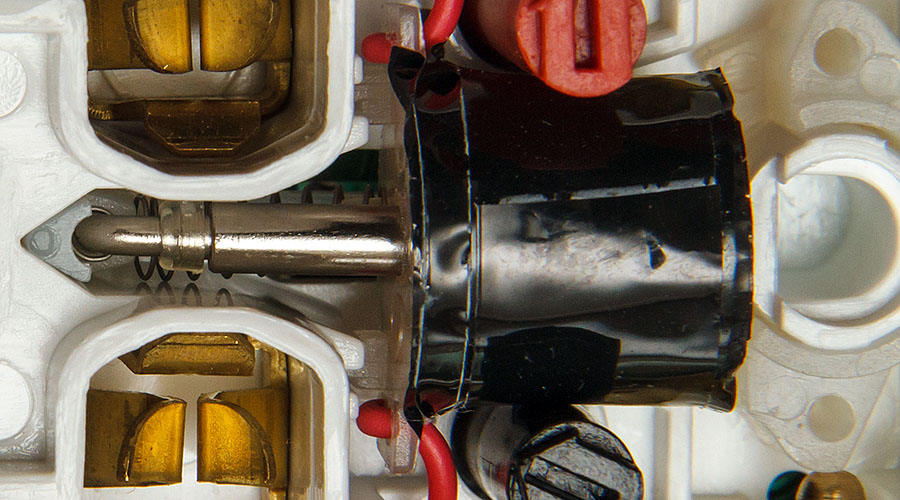
Super Socket with and without Solenoid/plastic tab in place
Note the tab runs all the way underneath the spring
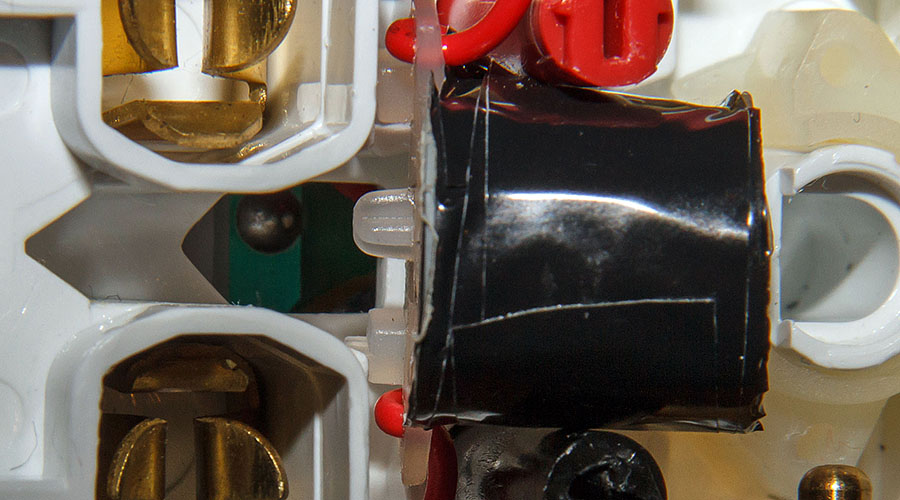
Closeup of the broken plastic tab that the solenoid attaches too
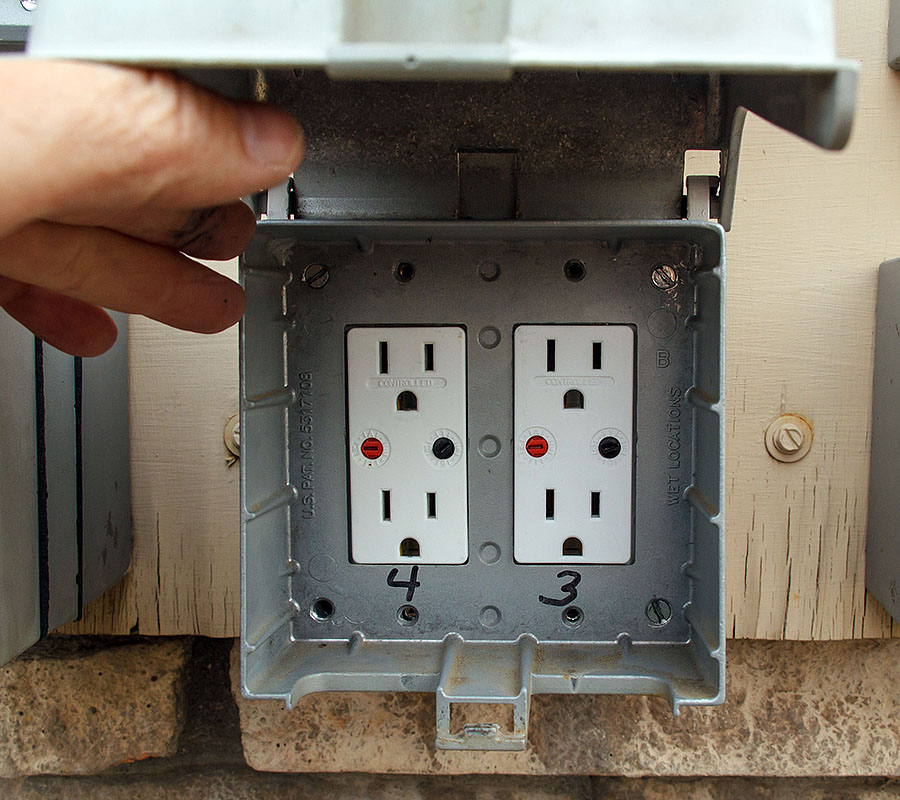
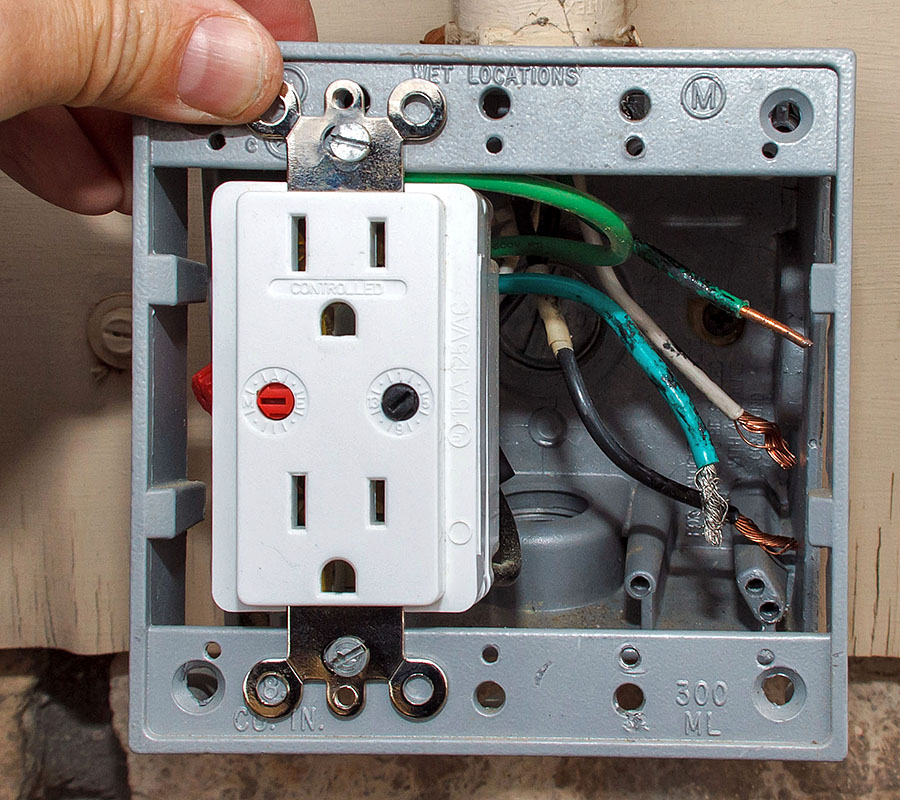
My outdoor panel has dual outlets - the "bad" one has been removed here
New Super Socket put in place with wire nuts
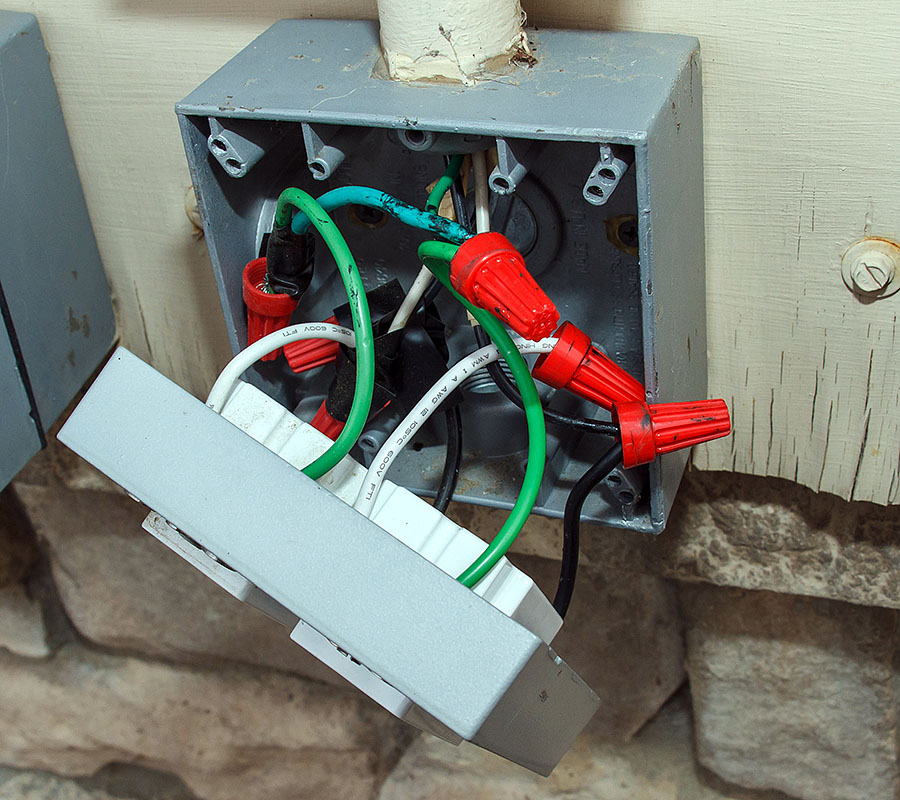
Even though it's inside a sheltered enclosure, electrical tape used to make it a bit more secure/watertight
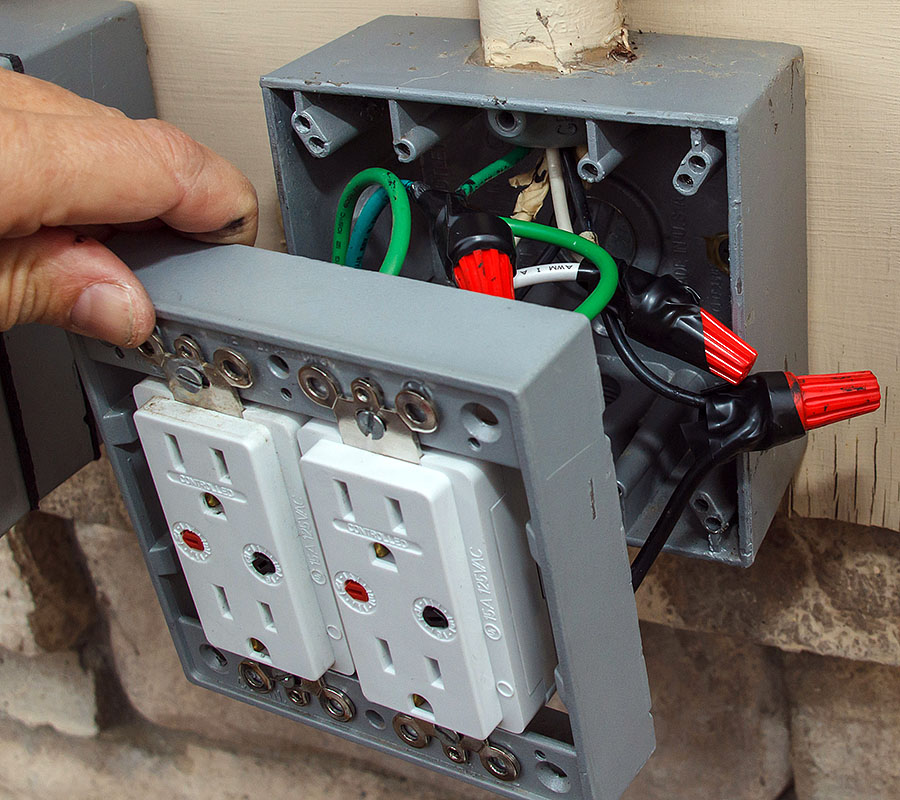
Back in production - here's the full panel installed in 2002 - give me full X10 power Scotty! ;-)