Back to main BBQ Grill page
or Alek's personal home page
- © 2002-2012 www.komar.org
|
|
There's so much BBQ stuff on my web site that even I use the search
form to the left to find stuff! ;-)
Disclaimer: I am NOT a gas/grill/whatever expert. Anything you do based on what is written here you do at your own risk. Converting the Member's Mark BBQ Grill to Natural Gas VOIDS the warrenty. Do NOT call me if you melt your grill, burn down your house, etc. |
A-2: What are the disadvantages to converting from Propane (LP) to Natural Gas (NG)?
A-2: (2002_07_10)
There are actually several disadvantages to converting.
a. With LP, you can move your BBQ around, whereas with NG, the location
becomes somewhat fixed ... although a long flex gas pipe can give you
some mobility.
b. With LP, you can cook even if the gas company has some sort of problem
delivering gas to your house (disaster recovery! ;-)
c. Converting requires some time/expense (although not much).
d. You can not go "back/forth" between LP & NG without some work, and once
you have done LP->NG, it is harder to go back.
e. Once you have converted, you will probably BBQ more! ;-)
A-3: What tools do I need to do the LP->NG conversion?
A-3: (2003_08_02)
Standard tools: screwdrivers, needle nose pliers, wrenches, etc.
You can get by with a standard set of drill bits, but a "numbered" set
of bits is extremely useful, but you only need to drill a few holes,
so hopefully you can borrow these. You will need some pipe joint compound
for all threaded connectors - essential if you don't want to blow yourself up!
A digital camera is quite useful so you can take pictures of things as you
take 'em apart - that way you can put 'em back togather again correctly -
especially useful for the orifices and valves.
It is helpful, but not neccessary
to know the regulated gas pressure - either call your gas company or
build your own manometer for a couple of bucks -
this is actually useful for flow analysis too.
A-4: How long will it take to do the LP-NG conversion?
A-4: (2002_07_08)
Probably about an hour or so to do the 3 mains, side, and back burners.
However, as noted below, you will want to do your initial drill holes
on the small side, and drill 'em bigger as needed ... so there will be
some additional "futz factor" time in there as you test the grill; so maybe
a good excuse to tell your spouse you need to make some steaks! ;-)
A-5: How much will it cost to do the LP-NG conversion?
A-5: (2002_08_05)
Basically nothing - all you are doing is basically drilling a
handful of holes a little bit bigger. Note that if you have a
"conversion kit", you pretty much have to do all of this stuff
anyway, so why not save yourself a few bucks! ;-)
B-2: What about using quick-disconnects/rubber flex line to the BBQ Grill?
B-2: (2006_09_05)
I don't quite see the point in using a quick-disconnect.
It's not like you are going to want to move your 200 pound grill somewhere!
And if you look at these, it's typically a pretty skinny diameter pipe
where the disconnect is, so this can prevent adaquate gas flow.
While you CAN run rubber flex line to the BBQ grill, be careful with
the inside diameter. Because you have to deliver a higher volume of gas
with NG, I had problems using 1/4" inside-diameter hoses ... and ended up
using a 3-foot 1/2" flex-metal connector (typically used for dryers,
hot water heaters, etc.). Using a manometer or measuring flow rates at
the gas meter will help you determine if you have a "lack of adaquate flow"
to the BBQ grill itself, especially when all three burners are on HIGH,
plus the side burner.
UPDATE: CraigB points out that
"Here in Florida we have to have QD's in order to make life much easier
prior to a hurricane. I have two-grills and a Weber fireplace that have to
be disconnected prior to the 120 MPH winds, and moved to our overhang
which is then shuttered in" - hurricanes aren't an issue in
Colorado, but great point Craig - thanks! ;-)
B-3: Do I need a regulator?
B-3: (2003_09_03)
You should not. Before the pressure enters your house, it should
go through a regulator and flow meter installed by the gas company.
See what this looks line on the gas-line web page.
B-4: What is the NG pressure?
B-4: (2003_02_12)
Most people report around 7" water pressure, but you should check
with your gas company to make sure. Or better yet,
build your own manometer for a few bucks
and actually measure it - quite easy to do.
B-5: How do I make sure there are no leaks?
B-5: (2002_07_08)
As mentioned numerous other places, you should be applying a soapy water
solution to ANY work that you do not only along the way, but at the end.
I put about 1/3 Palmolive and 2/3 water in a spray bottle and I went through
a couple of these during my work.
Here are more details and pictures.
C-2: How do I measure BTU output?
C-2: (2002_09_03)
One can attempt to measure BTU output by measuring temperatures,
but this can be time consuming and was not all the repeatable;
especially if there is any wind. It turns out you have an excellent
way to measure BTU output - the cubic feet/hour of the NG as
measured by your gas meter.
Fire up the grill and use your stop watch to measure how many
seconds it takes for a cubic foot (or whatever) or NG to flow,
and then calculate the Cubic Feet/Hour.
The gas company measures your usage in terms of cubic feet
although typically shows it on the bill in terms of
hundreds of Cubic Feet which is often abbreviated CCF.
One Cubic Foot of gas is nominally 1,000 BTU, but there will be a conversion
factor on the bill to convert to therms which
takes into account altitude, temperature, and energy content.
For me, that multiplier is about 0.8, so
for instance, if I measure 75 Cubic Feet/hour (CFH), this would be 60,000 BTU's;
assuming perfect combustion.
C-3: How much CFH/BTU do I need and what was your experience?
C-3: (2002_07_14)
You MUST have enough NG flowing into the grill itself before you start
drilling out the orifices. As noted above, it is fairly easy to measure
Cubic Feet/Hour and convert that to BTU's (it's about one-to-one at sea level).
I also had the manometer hooked up, so in certain cases, I could measure
the gas pressure (at the side burner) and see how it was dropping under load.
So after being "reasonably" sure there were no ignition sources nearby (for the
first couple of tests, gas is just venting into the atmosphere), I did
the following:
   WC"   CFH    Location
   N/A   200    From 1/2" iron pipe next to grill
   N/A    80    At end of 4' rubber "LP" hose with 1/4" inner diameter - discarded!
   N/A   155    At end of 3' 1/2" flex pipe and 1/2" to 3/8" connector at grill
   TBD    72    1 main burners on HIGH, orifices REMOVED
   TBD    98    2 main burners on HIGH, orifices REMOVED
   TBD   105    3 main burners on HIGH, orifices REMOVED

   6.5   N/A    No gas flowing
   5.9   TBD    1 main burners on HIGH, WITH orifices
   5.2   TBD    2 main burners on HIGH, WITH orifices
   4.5    80    3 main burners on HIGH, WITH orifices
   4.1   TBD    3 main burners on HIGH, WITH orifices plus back burner on HIGH
Conclusions: I initially used a 4' rubber "LP" hose that has an inside diameter of 1/4" ... this did NOT provide adaquate flow to the grill. The 3' 1/2" flex pipe (with 1/2" to 3/8" connector at grill) does some flow restriction. Even so, it appears that the grill connector itself (I recall this was 5/16" inner diameter) and the manifold further limits the CFH. Note that the manifold has an "LP" sticker on it - I kinda wonder if there is a larger diameter version that says "NG" on it. The drop in gas pressure concerns me a bit and suggests that I would be better off with a shorter run from the regulator and/or even larger diameter pipe so that it could reduce the pressure drop when under load.
C-4: Are there altitude issues?
C-4: (2008_09_17)
I live in Boulder, Colorado (actually Lafayette) and having an aeronautical
engineering degree, I said to myself that altitude should NOT play a factor
here - relative pressure (i.e. 7" WC) is the same amount of gas at sea level
as it is a mile high, and as long as I had enough air to get good combustion
(no yellow flames), it should not matter. However, it turns out that for
various appliances they DO sell high altitude orifices, which are SMALLER
than those for sea level. My theory on that is that it is easier to de-rate
the appliance with an orifice change than it is to ensure one has enough
volume of air (at the thinner higher altitude) to support complete combustion.
Or optionally you could put a turbo and/or supercharger on your burners
to insure enough air for a proper stoichiometric mixture.
So I'm not sure what is going on there ... but the bottom line is I DO
believe there is some sort of altitude affects going on, and you will need
more CFH at a mile high to generate the same BTU's as at sea level.
C-5: Is LP or NG dangerous?
C-5: (2002_07_08)
Don't be a
winner of a Darwin Award!
Not only can LP and/or NG cook your steaks, it can melt your grill
and/or blow up your house (or worse). Be careful, be sure to check for leaks,
and hire a professional if in any doubt.
D-2: How do I drill out the orifices?
D-2: (2002_07_11)
The orifice diameter controls how much gas flow occurs in the HIGH setting
(ON in the case of the back burner) and therefore sets the maximum BTU output.
If this is too small, your grill won't heat up fast enough and/or be hot enough
in general. Make this too big and you will "overrate" your grill - you might
not have enough air for clean combustion (yellow flames are bad) and/or
other stuff like maybe even melting your grill I guess! ;-)
Click here to see exactly how do drill out the orifices.
D-3: How do I drill out the control valves?
D-3: (2002_07_11)
The control valves regulate the flow of gas by turning it OFF and ON and
provide variable output. How does it do that? Remember that the orifice
diameter is fixed, so at the OFF setting, no gas flows. At the HIGH setting,
the control valve lets "lots" through, since the orifice will regulate.
And at the LOW setting, the control valve has a smaller opening than the
orifice, so it becomes the limiting factor. Any position in between gets
some volume of gas in between.
Click here to see exactly how do drill out the control valves.
D-4: How do I make the back burner variable in heat?
D-4: (2002_08_17)
Look carefully at the
control valve section above.
For the back burner, the "ring" section only allows rotation
of 90 degrees for OFF/ON ... rather than 180 for OFF/HIGH/LOW
as with all other control valves. It does this because the "groove"
which the D-ring sits is only 90 degrees. So ... you have a couple
of choices on how you can handle this:
- Drill out the groove (somehow) for 180 degrees of motion
- Remove the D-ring, so then it won't hit the stop
- SWAP "ring" sections with one of the mains.
I did the later, since I want to have fine control over the back burner
and "know" where the stops are ... whereas for the main burners, I'm not
as concerned - plus I can see the control knob positions easier relative
to the other ones ... plus if I go to far and it flames out, I typically
have other burners on, and it will re-ignite (I swapped with the center one).
Note that after this, you will need to drill out the back burner control
valve as outlined above - see D-1 for what I used - you'll need to do
experimentation on your own ... and I recommend doing this at night so
you can see the flames. Since the back burner is typically lit by itself,
you want to drill it conservatively large, since you do NOT want this
to flame out, since there is no nearby burner going to re-ignite it.
Although I have not done too much "spit BBQ'ing", I really like having
this tuneability ... as I can crank it down if I feel I'm charring the
outside of the chicken too much.
E-2: What should the flames look like?
E-2: (2002_08_17)
Click here to see some pictures of Alek playing around ... ;-)
E-3: What should the flames REALLY look like?
E-3: (2002_08_17)
A common question is what should the flames look like. I have a some
pictures of before-LP/after-NG (and after-LP - FIRE! ;-) that will show
you what this looks like.
Click here to see various flames shots.
F-2: How do I use the manometer to check for leaks?
F-2: (2006_01_07)
First, you need
a manometer
which will cost you about a buck to make.
Plug this into the side burner orifice as shown, and with the gas supply OFF,
open the side burner control to HIGH. Then open one of the MAINS to HIGH;
and then close it when manometer is in a stable position - it should
be level, if it's not, you goofed something up. While leaving
the side burner control on HIGH, turn the gas supply ON. The manometer should
respond and eventually stabilize at the regulated gas pressure. Mark this
location, and then turn the gas supply OFF. The manometer reading should NOT
move; this is basically testing everything downstream from the gas supply
valve up to control valves of the BBQ. Note that it does not test any leaks
past that; such as the tubing to the back burner or the orifice's themselves -
you will need to use the soapy stray approach on those. Standard disclaimer
applies, but nothing is completely airtight - I feel that if you take
at least 5 minutes to bleed off an inch of pressure, you are probably OK.
F-3: What do I do if I have a leak?
F-3: (2002_07_08)
Usually, this will simply require tighting the connection.
In some cases, you should put pipe dope and/or pipe tape in
place seal things - definately for "pipe" fittings, questionable
for flare fittings. Always be careful tightening to make sure you
don't bend any pipes in the process.
F-4: What do I do if I smell gas?
F-4: (2008_04_03)
Sending me an Email is NOT the right thing to do ... as actually happened when
someone emails me asking
"There seems to be a gas smell coming from our outdoor gas grill (which is already hooked up to natural gas). How do we UNHOOK the gas to the grill? Thanks for responding."
I responded to this person saying
"Uhhhhh ... if you are smelling gas, you might consider calling 911 rather than sending out an Email"
... but my Email bounced ... so unknown if Darwin'ism got applied here.
G-1: Does this REALLY work?
G-1: (2002_08_05) I've been grilling for months with Natural Gas and love it.
Daniel K. Schuster (aka Dannos) posted
his notes on doing a LP->NG conversion
and says he hasn't cook meat in his oven since!
Here is an
Email from Roy Brotherhood with some detailed notes on his conversion.
G-2: What about converting other grills?
G-3: (2002_08_05) The process should be quite similar on other grills.
For instance, you can buy a gas conversion kit for the Virco grill,
but owners have told me that if they were to do it over again, they
would probably just drill it out - you end up doing pretty much all
of the above anyway. I recently assisted a friend convert his
Kenmore grill and it was uneventful using these notes.
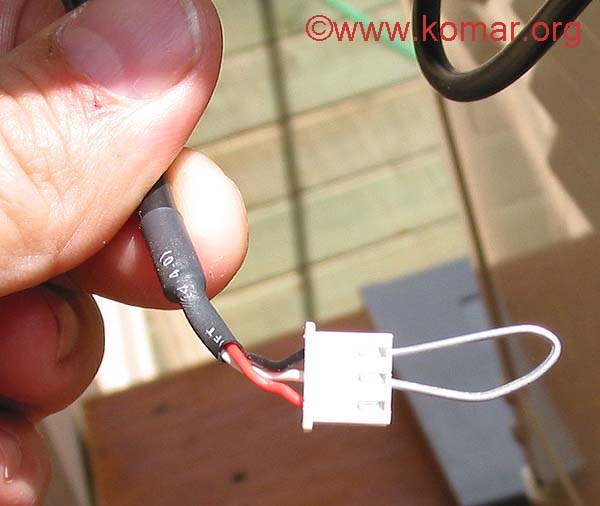
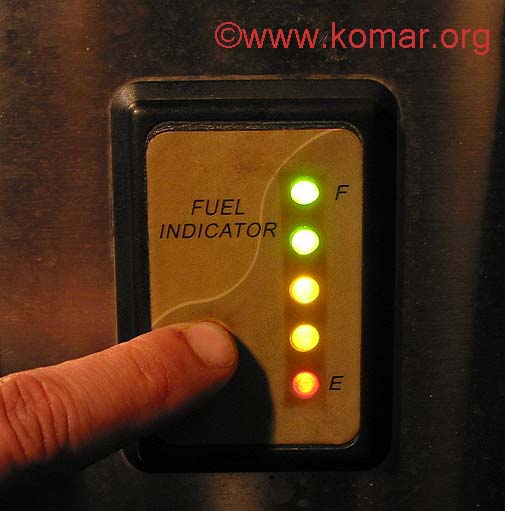
G-3: I converted my grill to NG - what do I to with the LP tank gauge?
G-3: (2002_08_07)
See if anyone with an older MM grill (this feature was introduced in 2002)
wants to buy it - anyone want to buy mine?!? ;-) Or
hotwire the connectors with a paper clip
so that it
always reads FULL ;-)
G-4: Can I convert my grill from NG to LP?
G-4: (2008_03_18) You can ... but this is the opposite of everything
written above ... and making holes SMALLER is MUCH harder than drilling
'em out to be bigger. If you do decide to do this, be very careful since
if you say, drop some solder in there to close up the hole, if it melts
and/or opens up, then you will have a blow torch on your hands - I personally
would not recommend/try this. An approach recommended by WallD is
to use a small ball peen hammer to close (or nearly close) the opening,
and then drill it back out. Brass is fairly soft, but be careful not to
ruin the threads. Note that if you find someone who wants to
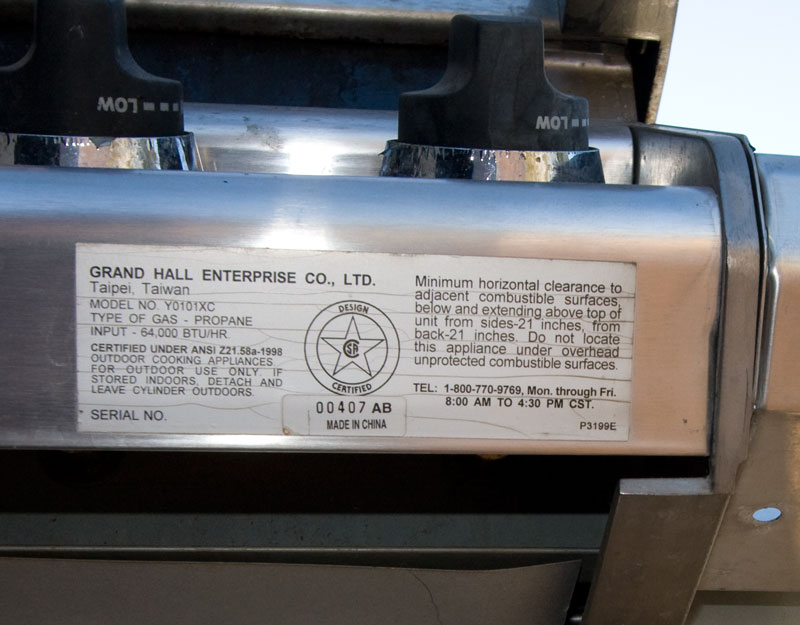
convert their grill from LP->NG, you could swap valves/orifices with 'em -
here's what the label on their grill
should look like.
Otherwise, your best bet is probably to contact the manufacturer, but again,
I would be very careful doing an NG->LP conversion.
G-5: Your How-To Guide is AWESOME ... can I Email you to say thanks and/or buy you a beer?!?
G-5: (2007_11_09) I'm delighted my web page has been helpful to 'ya - click here to Email me and/or buy me a beer - a surprising number of people actually do - thanks in advance! ;-)