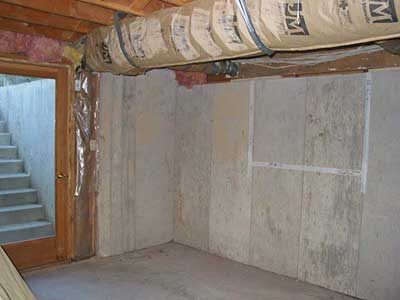


I had originally thought that if I took a scoop of dirt out every night, I would eventually dig down to the floor level and completely reclaim this 420 square feet for the basement. However, upon inspection/digging, it became apparent that the North and West foundation walls were NOT poured down to the basement floor level, but only about halfway (ditto for a load bearing concrete piller in the middle). I actually put my arm under the foundation of the house - a scary thought if it decided to settle right then! ;-)
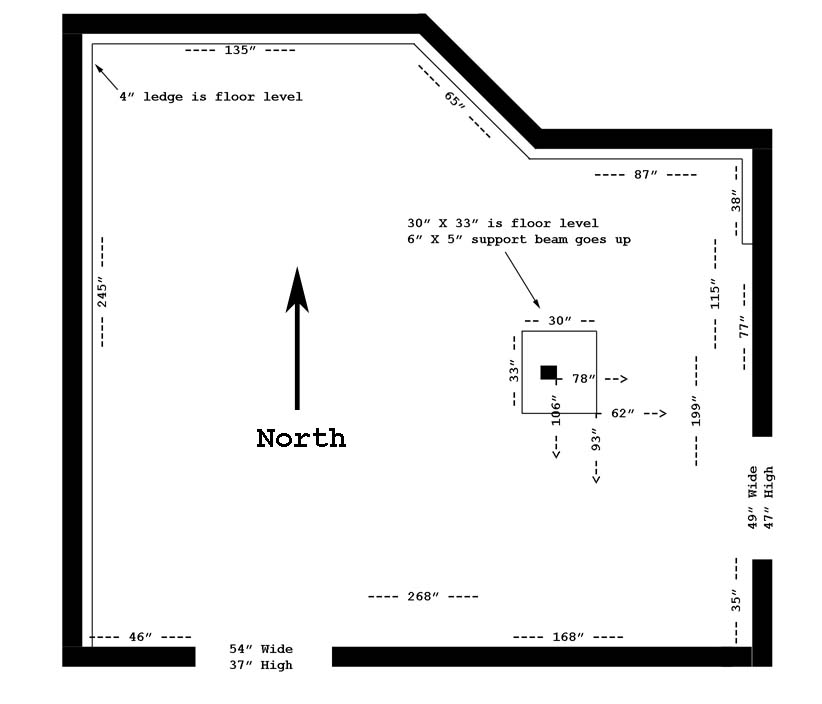
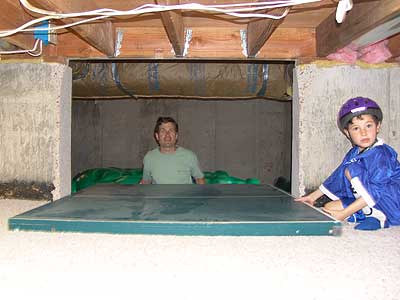
My neighbor DonK mentioned how he had put a floor over his basement crawlspace dirt in a previous house ... so I figured I could do this to at least reclaim this as storage space. Assuming I was going to use all of this, the first thing I needed to do was improve access to the crawl space. There was only one 36" X 49" hole on the East end which had pretty restricted access due to the stairs being next to it - here is is a large picture of the basement crawl space schematic that is shown on the left. So after thinking about it a bit, I decided to hire a concrete cutter to cut out a similiar size hole for a South entrance.
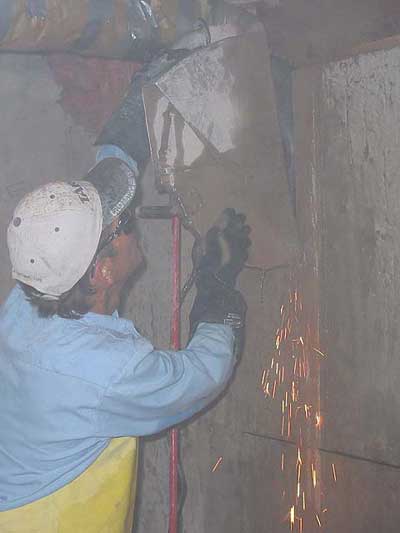
Remember this is a load bearing wall, so I had visions of the house tumbling down into the basement ... but I chatted with my neighbor KeithM, who teaches construction engineering at CU-Boulder who gave me confidence that wouldn't happen - the house is still standing several years later! ;-) I measured my ping-pong table which was the determining factor for the width of the hole. The location was determined by some HVAC vents so I just added a header and some joist hangers. I then needed to determine how far down I wanted to cut ... and this was based on the vertical height of the concrete column in the middle and a ledge that ran alongside about half of the inside walls. I borrowed a laser level from neighbor JohnS which made marking the floor level (and cut height) much easier than doing with a regular level. I also marked the existing East hole to be dropped about a foot. I got some great pictures of cutting concrete in a 8" re-bar basement foundation walls with one BIG saw! It cost me $342, but I could not have done this otherwise. Ironically, 3 years later I would have 20 tons of Colorado stamped concrete poured into my backyard.
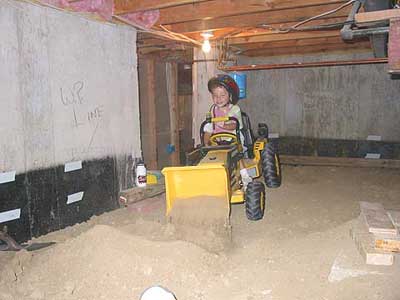
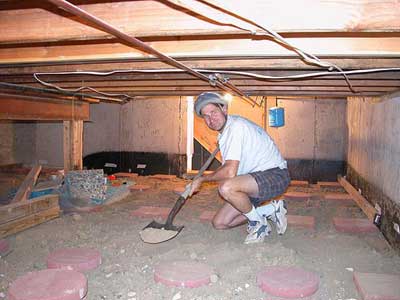
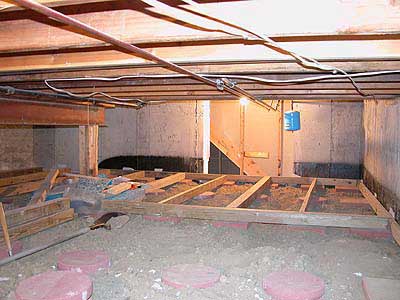
So now that I had holes in the wall, it was time to level the basement crawl space dirt. Unfortunately, I didn't take any pictures BEFORE I started digging; but there was a LOT that needed to moved around as it was piled high in several places. I had eyeballed this and it looked to me like the average height of the dirt would be several inches below the floor height. Fortunately, this turned out to be the case (at least that is what it looks like so far! ;-) since removing say, 2" of dirt over 420 square feet would be 70 cubic feet of dirt - that is a LOT ... and it is HEAVY. Fortunately, I had 4 year old "Dirk the Digger" bring in his front-end loader to help me level the dirt! ;-)
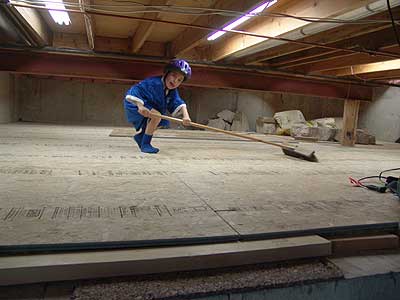
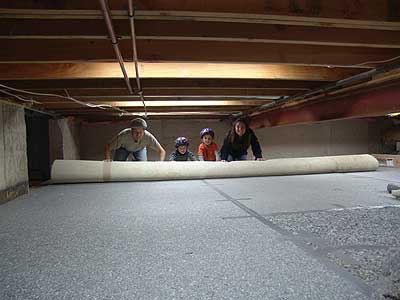
Suffice to say, this was back-breaking work ... since you are stooped over the entire time ... and I was wearing a bike helmet as one can not help but bump your head against pipes/beams/etc. occasionally. I had dug out/levelled most of the basement crawl space, but rather than finish that job, I was getting tired of doing that stuff ... and wanted to actually lay some floor and see some sign of progress.
So I made a monster Home Depot run - even rented their home delivery truck and I completely filled it. Fortunately, my brother Myke happened to be stopping by ... so I "recruited" him into helping me unload it. The parts list was: Lotsa 12" concrete pavers for the footings, a buncha 8' 2X4 & 4X4's, 13 pieces of 4' X 8' tongue and groove flooring, 50' of 4" corrugated pipe and T connectors (for possible use in active radon system), big roll of plastic (to seal up as best as for radon abatement), and all sort of other misc. The pile of stuff in the crawl space basement easily reached the 4' from the dirt to the ceiling!
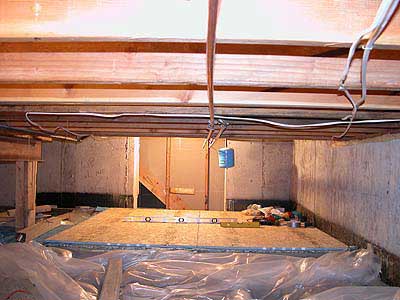
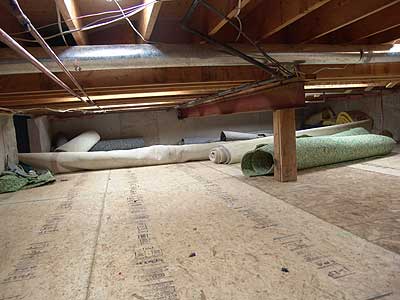
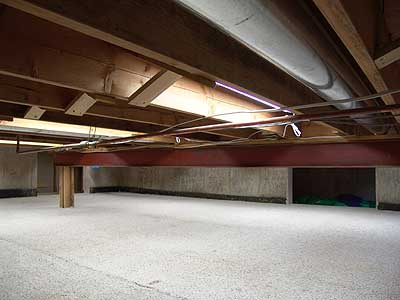
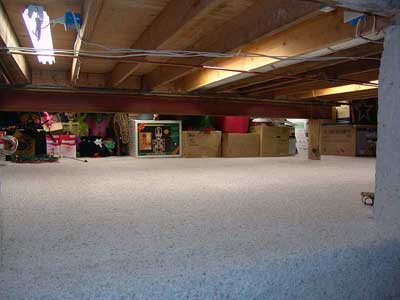
There is more details/pictures at the URL below, but basically I semi-leveled the dirt, put the pavers in place spaced every two feet on the "width" of the T&G (with pavers at the ends and in the middle lengthwise), built a frame on top of that, trenched the corrugated pipe below the frame, put plastic below and above the frame (a bit of overkill), and then put the flooring on top to finish the basement crawlspace. Here are some pictures of the progress I had made as of November 30th, 2002 on my basement crawl space.
BTW, my house had (barely) flunked a radon test when it was bought it back in 1997 - it measured 5.1 picoCuries/Liter - you are supposed to be under 4. So I figured with the additional concrete wall cut-out and exposed dirt, this would be the worst case scenerio ... and it was with measurements of 8.3 and 9.4 picoCuries/Liter. This isn't as bad as it sounds since based on the EPA Radon Risk Chart, this increases my chance of lung cancer from 2 per 1000 to 4 ... if I was a smoker, it would be 71! And since I don't spend that much time down in the basement, I'm not too worried. But in case I ever have to install an active fan-type radon system, I provisioned for it with the corrugated pipe underneath the plastic. I did some radon gas testing when the project was all done, and measured 3.3 picoCuries/Liter, so I'd call this a success. Note that later on, I did hook up an active fan and it dropped to below one! In 2023, I won a free home radon test in a charity fundraiser ... and they measured 0.78 in the basement and 0.59 in the upstairs master bedroom. As an aside, positive pressure radon abatement systems show their results with a manometer not much different than that one! ;-)
This project has kinda been fun to do - stuff left to do as of 2002 is:
Finish up levelling (and bury the concrete chunks)
Deploy rest of pavers, pipe, wood, plastic, floor, etc.
Put some doors on the two openings
Caulk all sides/joints
I have a buncha of old carpet - roll that out!
Put some lights in there
It would be nice to finish so I can store my
bazillions of Christmas Lights
into the basement crawl space.
Back at work in Early 2005
After a couple of year hiatus, I'm back at work in early/2005 and hope to finish the basement. I had to continue digging/leveling dirt, putting down the pipe, plastic, foundation, and floor. It's a bit of work in the cramped confines of the crawl space.The kids helped me pick up some misc. pieces at Home Depot (they enjoy riding on the big carts), and I found some cheapo $7 shop lights, so I grabbed a bunch of these and installed them - let there be light!. I ended up going back for four more for a total of eight of 'em - argueably overkill, but what do you expect from the guy who puts out bazillions of christmas lights and halloween deocrations! ;-) I wired 'em all up to a 3-way switch, so you can turn 'em on & off from either entrance to the crawl space and put hot outlets next to the switches in case I want power for the crawl space. Before, I had been running extension cords to an outlet in the basement and using some portable lights, so this was a huge improvement. And being a safety type of guy, I put a GFCI in to protect it all in case of a ground fault.
It became apparent as I finished up that there was no way I was going to be able to bury the leftover concrete chucks as the dirt level was just about "right" as-is. So I just moved those aside (man, are they heavy!) while I finished up the flooring. Dirk suggested I put 'em out for the garbage man, but I said that just isn't right ... plus this is probably a few thousand pounds of concrete chunks, so I just piled 'em up on a corner floor that had additional foundation beams underneath it.
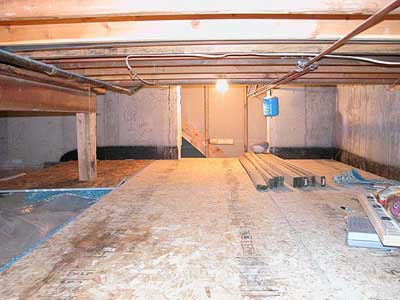
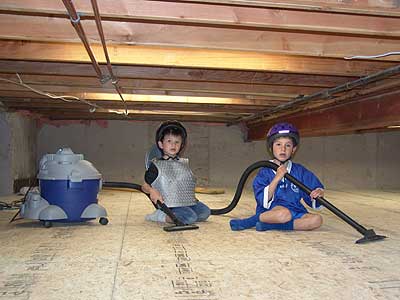
Once I had the vast majority of the flooring done (just have some trim work left on the back side), I did a big clean up of tools, parts-n-pieces, etc. followed by a sweep of the residual dust (and sawdust) that had settled everywhere, and then had my kids vacuum the basement. I then finished up the trim works and caulked all the joints - we'll see if any Radon can seep outa there now! ;-)
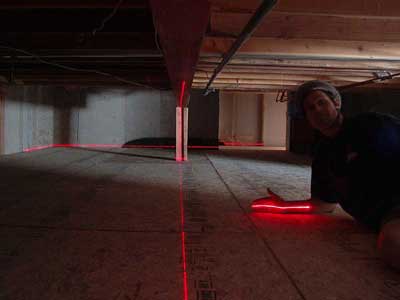
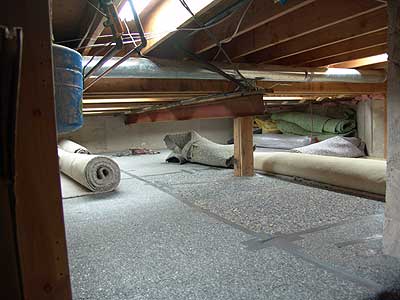
I was curious to see how good a job I'd done of levelling the floor. So I grabbed a $10 laser level from Costco - this model projects both a vertical and horizonal "sheet" (rather than just a single point), so it's ideally suited to assessing how level the floor is. The hardest part is getting the level itself *exactly* level ... but using my best shot at that, it looks like the floor is less than an inch off of level across the 20+ linear feet of the crawl space, which isn't too shabby! Check out the laser level in action.
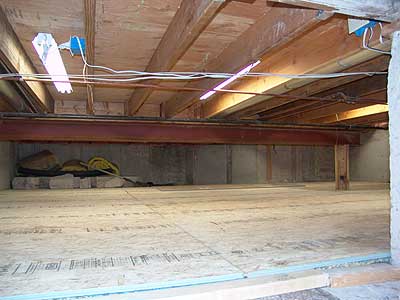
My neighbor KeithM (Dr. Construction Engineer) was nice enough to come by again for an "inspection" - he said it was a good job and the floors felt real solid, plus the shop lights were a good addition. If anything, I had done an "engineering overkill", which I agreed with but I'll take as compliment! ;-) He said roll out the pad & carpet out and call it a done. Here's one last look at the end of April/2005 of the basement flooring.
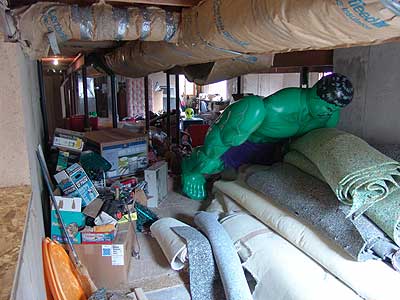
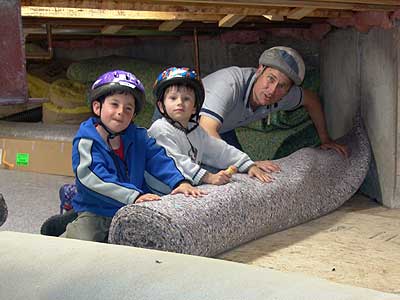
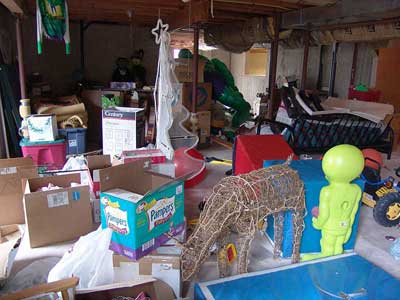
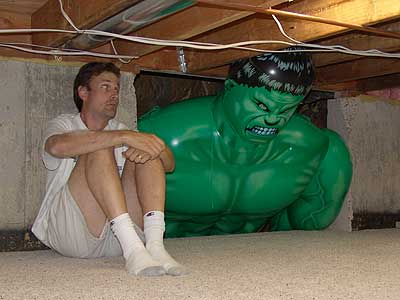
So now I was ready to lay down the carpet, and for the last 3 years, I've collected some leftover/throwaway carpet (and pad) - check out the picture on the left of the The Incredible Hulk keeping guard over it. Ironically, my neighbor DaveM just re-did their living room, so I got some giant pieces of carpet and pad and ended up with way more than I needed. The first weekend of May was cold and rainy/snowy, so I was able to put about 10 hours into this and it goes fairly quickly. I tossed a bunch of the carpet and pad up into the crawl space. The pad is easily trimmed with scissors and a staple gun is used to anchor it - just want to make sure it doesn't move as I overlay the carpet. The monster piece of carpet measures 14' by 18' - this was a bear to move and get positioned, but it sure filled up a big chunk of the crawlspace and reduced the amount of fill-in required. I used a box cutter knife (cut from the back side) to trim the carpet. I decided not to use a knee kicker or power puller to stretch it but instead pounded in some 1/2" by 1" "nails" to anchor the carpet and then pulled it by hand, hammering in nails every 5' or so. Seems to work just fine with no bunching. It was kinda like a giant puzzle after that as I would lay out the remaining pieces to see which fit best and then filled in the gaps. I trimmed the touching pieces as best as possible and used duct tape on the bottom and those nails to make 'em match up semi-decently ... you may want to use a glue gun for the no-seam look. Read/see more about the basement carpet and it didn't turn out too shabby if I do say so myself! ;-)
So then I moved all of my
basement junk into
the crawlspace. That is, of course, a never-ending job, but the basement
sure looks a lot better already ... although it's a tight squeeze for
the Big Green Guy. Some things left to do are:
Maybe put some doors on the two openings
Think about putting a step to make access easier
Re-test for radon gas
I actually did put in some concrete blocks as steps to the crawlspace - will
have to shoot some pictures of that one of these days.